
STIPE Control Panel: A Quick Introduction
Get to know your STIPE Minecraft control panel, from server settings and modpack installers to profiles, files, backups and scheduled tasks.
By STIPE Support · 5 min read · Reviewed 16 Nov 2026
Your STIPE control panel brings your Minecraft server's settings, installers, files and backups together. This guide introduces the main sections and where to start.
Your server at a glance
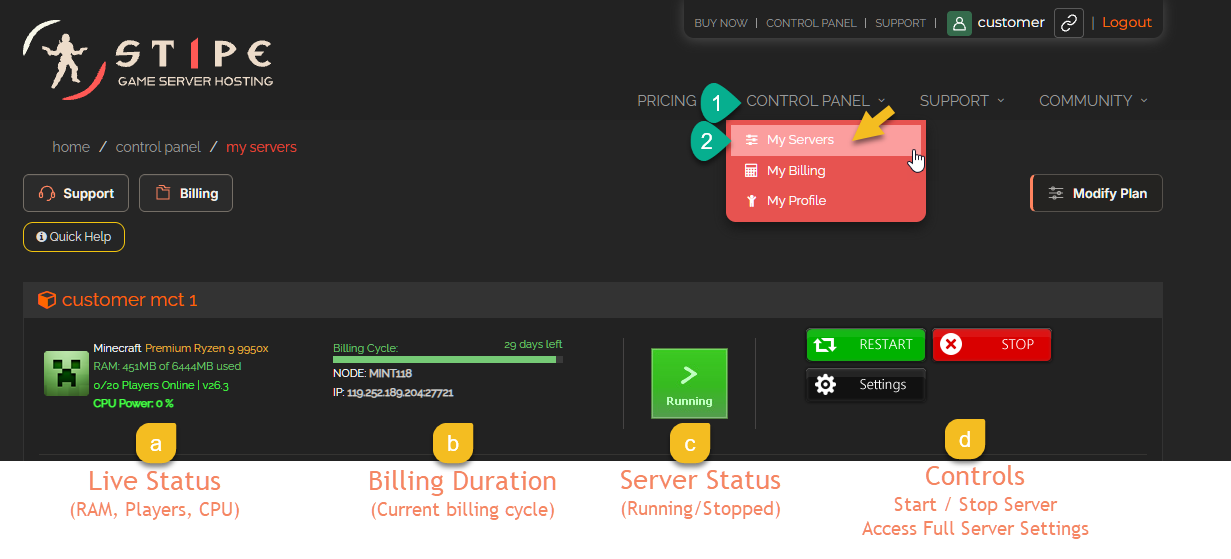
From our website menu, Control Panel -> My Servers to view your servers. This section allows you to view your server status, start and stop controls and manage all its settings. Choose Settings to open the management tools for that server.
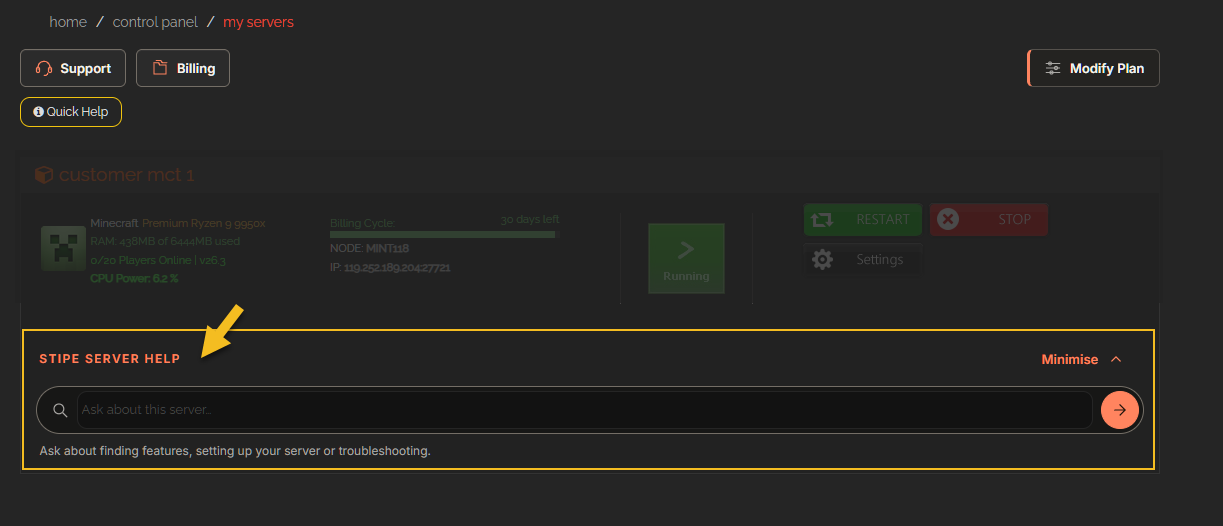
Use Server Help when you need help finding a feature, setting up your server or understanding an error. Billing and Modify Plan are also available from My Servers.
Server Settings
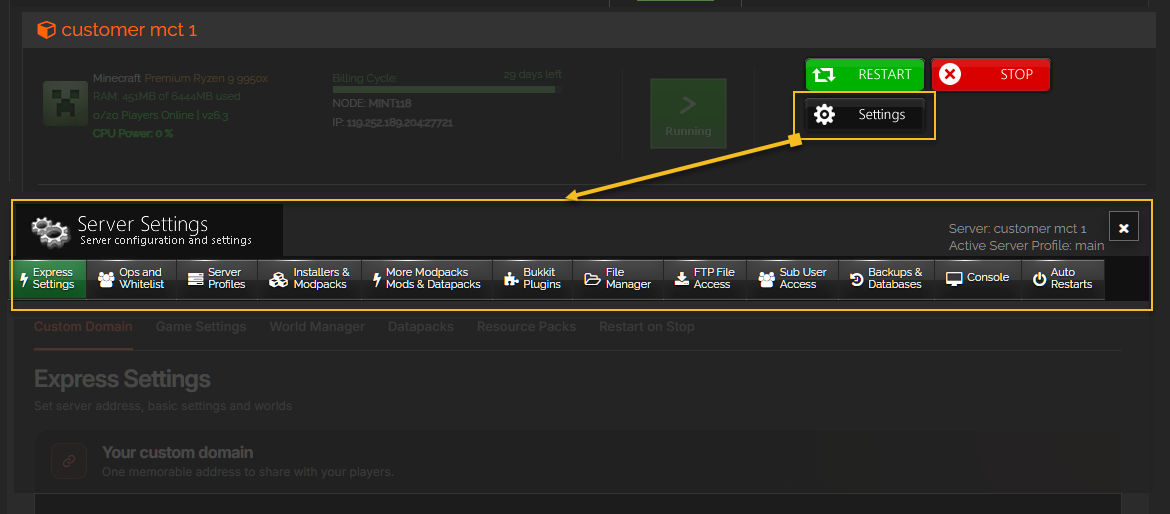
The Settings section brings up everything you need to connect and configure your server. Each section is powerful and easy to use.
Express Settings:
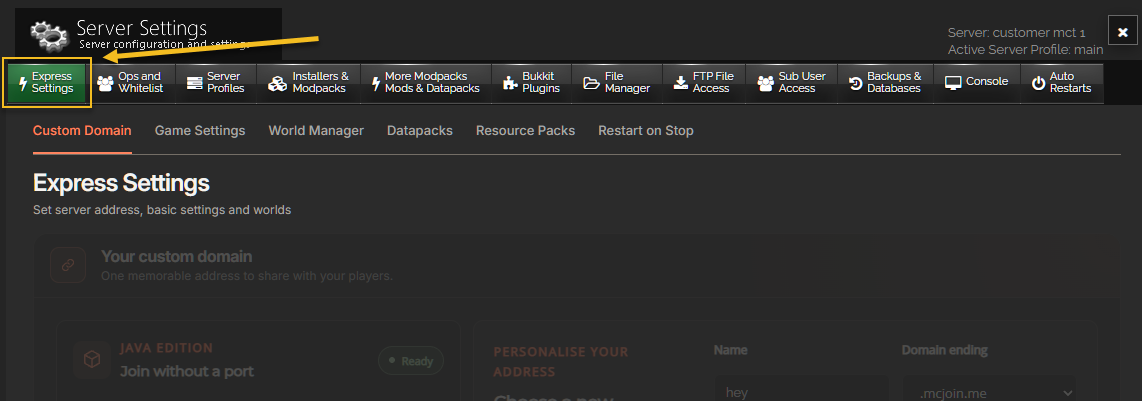
Express Settings brings the everyday options together. From here you will find your changeable connection address, Game Settings, World Manager, Datapacks, Resource packs, and more.
Express Settings - Custom Domain:
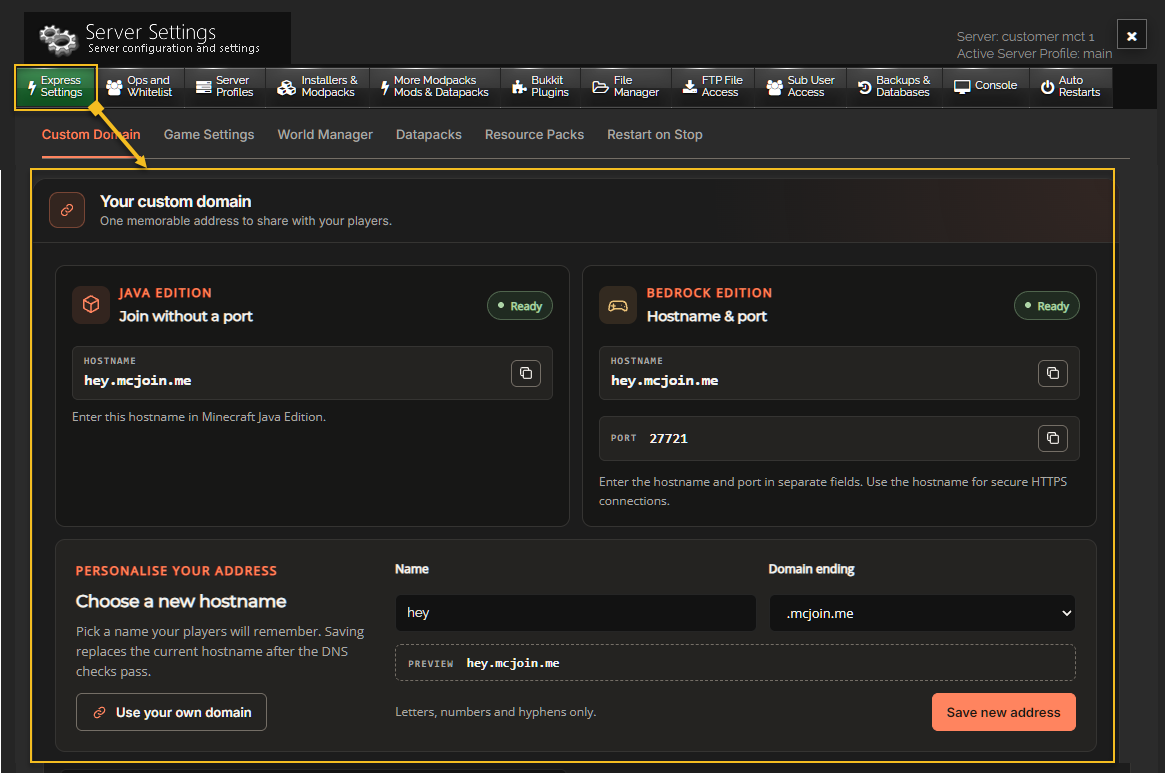 Under Custom Domain, simply copy the address and share with players, or choose and save a different hostname of your choice. Details are given depending on the edition of Minecraft you are using (Java, Bedrock, or Both with GeyserMC).
Express Settings - Game Settings: Game Settings includes your server title, player limit, whitelist and gameplay rules. Save each section after making changes, or use Save all game settings.
Under Runtime, select the server JAR, Java version and timezone. Follow the Java recommendation for your selected server software.
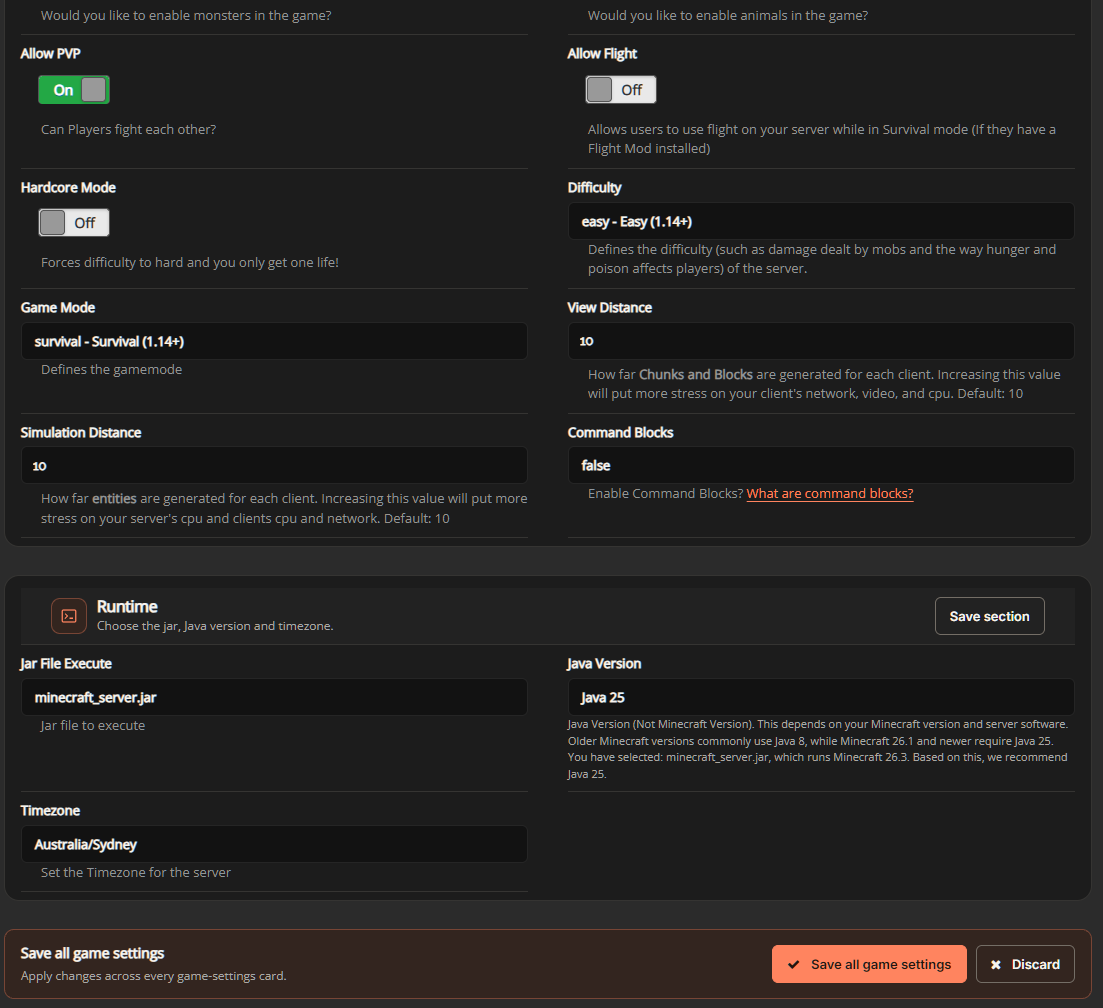
For a compatible Java server with GeyserMC, check the Java and Bedrock connection information before sharing the addresses with players.
Worlds, datapacks and resource packs
Use World Manager to choose a world or create a new one, with an optional seed. Follow any restart instructions shown by the panel.
Datapacks change gameplay for the current world. Resource Packs are managed separately, with options for the download prompt and whether players must accept the pack. Check that your packs support the Minecraft version you are running.
Player access
Ops and Whitelist manages operators, whitelisted players, banned players and banned IP addresses.
To make a private server, add your players and enable the whitelist in Game Settings. Operator access gives players powerful in-game permissions, so reserve it for trusted people.
Server Profiles
Server Profiles keeps separate installations, worlds and settings. For example, you can keep a vanilla server in one profile and a modpack in another, then switch between them. Only one profile runs at a time.
Check the active profile before installing software or editing files. Changing a profile changes the installation you are managing; changing a world selects a world within an installation.
Installers, modpacks, mods and plugins
Open Installers and Modpacks to choose server software or install a preconfigured pack. Check the Minecraft version and mod loader before proceeding.
The provider browsers include CurseForge, Modrinth, Feed The Beast and ATLauncher. You can also upload your own CurseForge ZIP or Modrinth MRPACK and follow the installation options afterwards.
Use Individual mods for smaller additions. Some mods also need to be installed on each player's computer.
Bukkit Plugins lets you browse, upload and manage plugins for compatible software such as Paper or Spigot. Vanilla Minecraft does not load Bukkit plugins.
File Manager and FTP
File Manager lets you browse folders, upload and download files, create files and folders, and edit supported text files. Check its active-profile bar before saving changes.
Right-click a file or folder for its available actions, including properties and ZIP creation. You can open File Manager in a separate window for more room.
For a desktop transfer application such as FileZilla, open FTP File Access for the connection details.
Sharing control-panel access
Use Sub User Access to give another STIPE user permission to help manage your server. Add their STIPE username and choose the permissions they need.
Control-panel access and Minecraft operator permissions are managed separately.
Backups and downloads
Open Backups and Databases to see your available restore points. Check the date, time and backup source before choosing one.
Use Browse files to inspect a backup, preview supported text files, and select files to restore or prepare as a ZIP download. Download current server files prepares a copy of the live server's files.
Downloading gives you a copy; restoring changes the server's files. Keep the current profile active until a download finishes.
Console and scheduled tasks
Console shows server output and accepts commands while the server is running. Enter commands without a leading slash. You can also open Console in its own window.
Auto Restarts includes daily restarts and advanced weekly scheduling. Daily restarts run when the server is already running. Weekly schedules can start, stop or restart the server, or send a console command.
Check the displayed timezone before saving. Each saved schedule keeps its own timezone, including daylight-saving behaviour.
Getting help
Start by checking your server address, game settings and active profile. If you need assistance, use Server Help or contact STIPE support with the server name and what you were trying to do.
Control panel video walkthrough
Watch the walkthrough below for a tour of the control panel and its main features.