If your PC (or any connecting client PC) are using a large modpack and you have issues with connecting (such as timeout or slow frame rates) you may need to set a higher RAM value of the modpack's java instance. This is a client side RAM and does not affect the server.
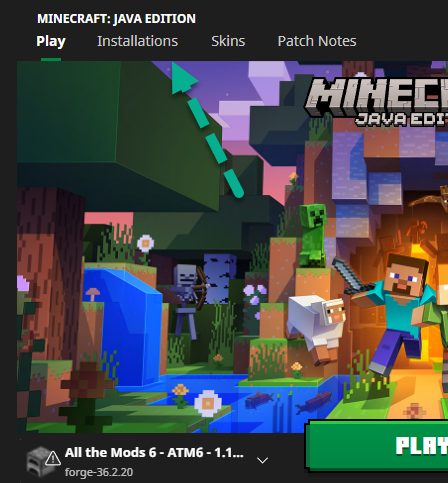
This can be achieved from Minecraft Launcher before clicking "Play" to start the game.
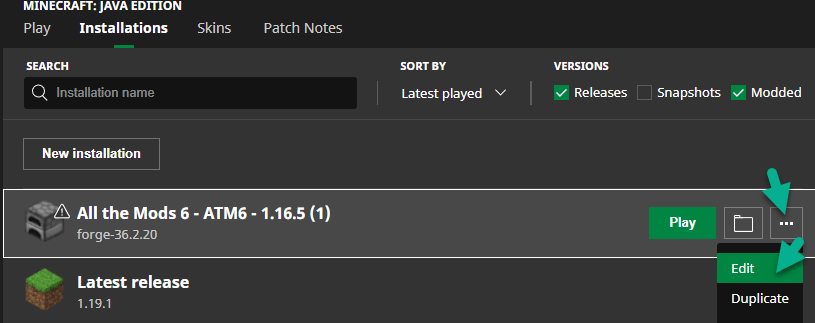
Step 1) Go to the Installations Tab and edit the modpack settings as per image below


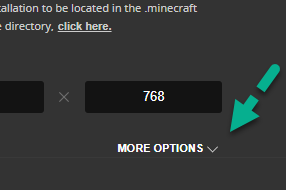
Step 2 )Choose More Options


Step 3) Look for
-xmx and note the numbers after it. If it says 4096m then it means its set to 4GB RAM startup, which is default setting and this may be too low for large modpacks. Try increasing this number to 5000m for 5GB or 6000m for 6GB or higher (This depends on how much RAM you have on your PC, see notes below)

Step 4) You can now save it and launch the modpack
NOTES:
Before increasing the RAM settings for your modpack, you need to make sure that you PC has sufficient free RAM
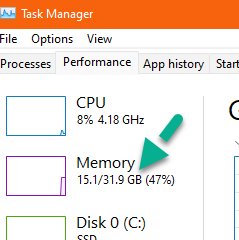
Your Task Manager can show you how much RAM remaining you have, like in this case below, there is 31.9GB total RAM and only 47% is used so far. This means it is possible to start the modpack with 16GB of RAM but its a good idea to have a bit extra for the OS and other programs, so 14GB would be the maximum.
